
 |
| Rawr! |
You will need:
- 4.0mm crochet hook
- Aran weight yarn (I used Debbie Bliss Cashmerino Aran, which is all fuzzy)
- Scissors
- Felt Scraps, co-ordinating thread to stitch them on with.
- Teddy bear eyes, these are 8mm ones
- Patience and the ability not to crochet yourself to your work.
Pattern as follows:
To make the hat:
Create 6 single crochet stitches into a magic loop. Pull the loop tight.
Increase [Inc] all six stitches; this means you work two single stitches into every stitch = 12 st.
Single crochet 1 into the first stitch, then Increase 1 into the next stitch around the 12 stitches [Sc1, Inc 1]
For the next round [Sc 2, Inc 1]
Next round [Sc 3, Inc 1]
Next round [Sc 4, Inc 1]
Next round! [Sc 5, Inc 1]
Work around the brim 3 or so times until your hat is the depth you want. Tie off and weave in ends.
For the ears:
Decide where you want the ears to be placed, then working in the holes between the stitches of the hat, pick up 4 single crochet stitches for the base of each ear.
Work backwards and forwards as follows:
First row: Chain 1 [Sc 1, Inc 1, Inc 1, Sc 1] = 6 stitches
Next row: Chain 1, Sc all stitches.
Next row: Chain 1 [decrease 1, Sc 2, decrease 1] = 4 stitches, tie off and weave in ends.
If you're not happy picking up stitches, then you could always work the ears separately off of a chain of 4 stitches, then sew 'em on afterwards.
If you're not happy picking up stitches, then you could always work the ears separately off of a chain of 4 stitches, then sew 'em on afterwards.
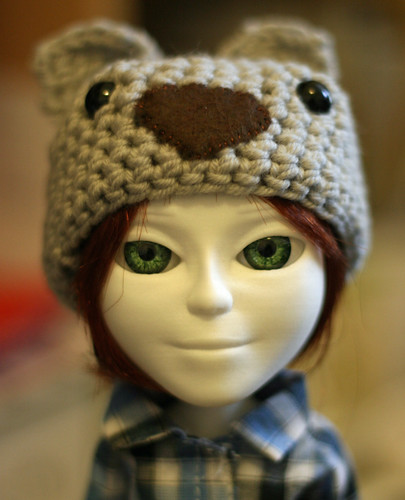 |
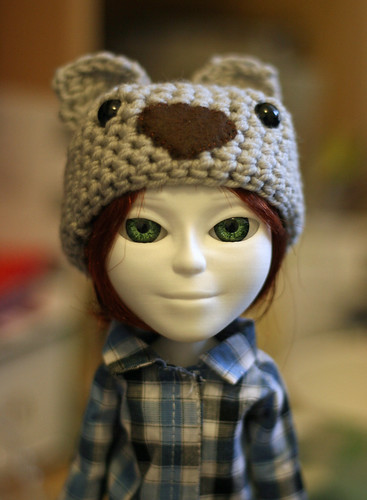
| I can bear-ly believe it! |
Once the ears are on, all you need to do is cut your nose shape and stitch it on, then push the eyes through the holes between the stitches. Have fun adding whiskers, changing ear shapes and experimenting with different colours!
It would be pretty easy to make ear flaps for these hats! You just pick up stitches along the brim, work back and forth for a few rows, then decrease at the edges to a point. Finish off by adding a doubled strand of contrasting colour wool and braid to a pretty pleat.
Wow -Awesome Pattern - Cant Wait to make it for our Makie "Elphie" - Thanks so Much!
ReplyDelete