Heat-Resistant Properties of Makie Parts and Joints
Professor Plink*, Dr Melchett, Dr Duckie
Welsh Institute for Makie Sciences, South Wales, UK
*corresponding author, tweet @ProfPlink
Abstract
It has been hypothesised that the exposure of Makie parts to heat could lead to catastrophic shrinkage and subsequent joint malfunction. In this paper, we demonstrate that not only do individual parts have excellent heat-resistant properties when subjected to temperatures up to 100 degrees centigrade for extended periods of time, but also that jointed extremities retain function and structural integrity following such treatment.
Introduction
There has been extensive speculation during the quest for colourification of Makie skin as to whether the Makie components are adversely affected by the process of dye application, particularly as it relates to temperature. Widespread speculation amongst the community has held that there is a risk of 'shrinkage' of pieces in proportion to one another, thus leading to joint laxity and loss of stability in the Makie.
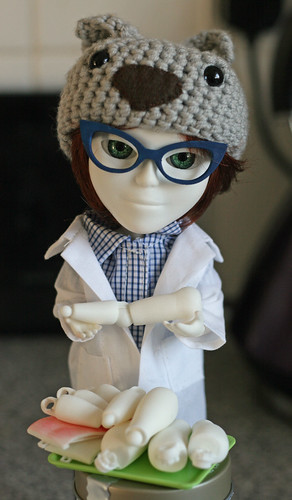
 |
| Dr Melchett demonstrating Makie Flexibility and Stability. |
In this paper, we set out to demonstrate once and for all whether application of heat via an aqueous medium led to any evidence of joint or part a) destruction b) shrinkage. We use a variety of Makie parts in this process, including the unique MORA part: Melchie's Old Right Arm.
We have elected to take a 'destruction testing' route, subjecting the Makie components to temperatures far in excess of those used in the dyeing experiments performed thus far, for a time period beyond those which have been used. Essentially, we wanted to see what these pieces could take.
About the MORA
Melchie's Old Right Arm was subject to a minor manufacturing flaw, and has a defect in the lip of the shoulder joint. It was kindly replaced by MakieLab approximately two months after Melchett was printed and has been kept out of light, excessive heat and dust since. The MORA provides an advantage over the standard 'Bag Of Bits' used in Makie experimentation as it has both joint components in their fixed state, thus offering change to study articulation, posing and attachment to the standard Makie Model.
Method
Makie bits (MakieLab UK) were selected from a standard 'Bag of Bits'. Four calves, four forearms, two back plates and the MORA were selected for use in the study. The back plates were excluded from final analysis as they had already taken a trip through a domestic dishwasher.
 |
| Dr Melchie demonstrating the MORA |
A stainless steel saucepan (Homebase, UK) was selected and filled with cold tap water, which was measured at a temperature of 17 degrees centigrade. Makie parts including the MORA were added, a lid placed on and the water brought to the boil, attaining a temperature of 99 degrees centigrade by the Welsh Institute's entirely faulty and inaccurate meat thermometer.
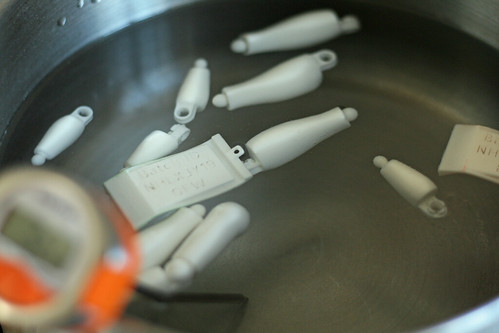 |
| Hubble Bubble |
Once a rolling boil was established, a timer was set for 30, 60, 90 and 120 minutes. At each of these time points, one forearm and one calf piece were removed. Back plates were removed at 60 and 120 minutes. The MORA remained in the boiling water for the entire 120 minutes. As pieces were removed, they were labelled with their batch number and total time of immersion (in minutes).
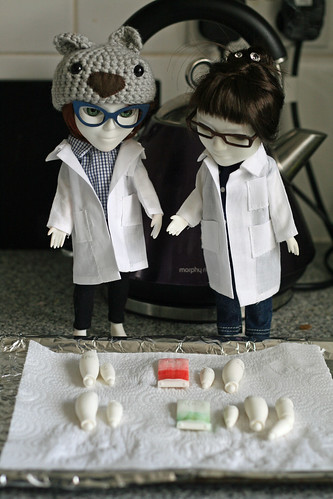
 |
| Marking the bits. Backplates were excluded from analysis. |
After removal, the pieces were allowed to drain on kitchen towel and completely cool to room temperature before any manipulation or assessment was tested.
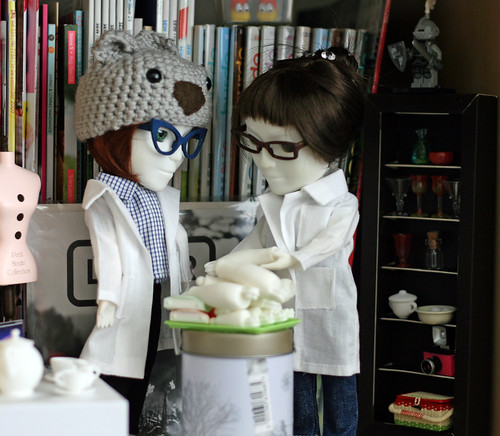
 |
| Macrocomparison. |
Assessment was carried out subjectively by a trained Makie Observer (Dr Duckie) and objectively using weight and balance testing.
 |
| Back to the lab for closer assessment. |
Results
Macroscopic appearance of the finished pieces can be seen below. There was no variation in size between batch 1 (30 minute time point) and batch 4 parts (120 minute time ponit). There was no variation in size between parts from batch 4 and an un-boiled Makie calf/forearm belonging to Prof Plink.
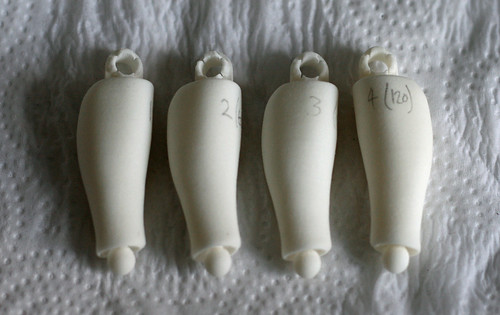 |
Calf bits. Note: there is no colour difference between the batches to the naked eye.
From L to R: 30, 60, 90 and 120 minutes. |
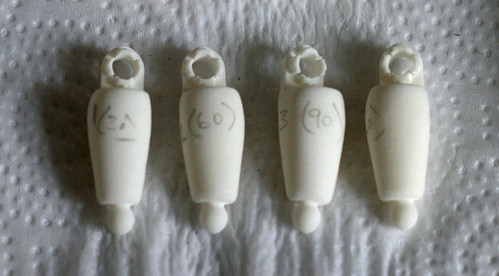 |
Forearm bits. Again, no colour difference to the naked eye.
From L to R: 30, 60, 90 and 120 minutes. |
Pieces from batches 1 and 4 (30 and 120 minute time points) were selected for application of Melchie's Left Hand or Plink's Left Foot, depending on whether they were a calf or forearm piece. Fit and flexibility were compared to the originating Makie. In each case, there was found to be no laxity of the joint nor any increase to a level of unwanted flexibility. There was no significant difference between the 30 minute and 120 minute time point in perceived level of attachment or laxity. Fit remained excellent throughout.
The MORA was separately assessed for fit, flexibility and strength by Dr Melchett.
There was found to be tight fit at the shoulder and at the wrist as in the existing Makie arm. Elbow flexibility was preserved, with comparable range of movement to the existing Makie arm. There was no increased laxity of the elbow joint evident. The elbow joint was able to take and hold a variety of flexion and extension positions (including hyperextension), with comparable stability to the existing Makie arm. There was minimal laxity of the forearm on the arm at the elbow, with a 'sideways' movement of the arm comparable to (but not in excess of) the existing Makie arm. Range of movement at the shoulder and wrist was identical to the existing Makie arm, with the proviso that the original flaw in the MORA component meant it fell off at extremes of internal rotation... which is why it was replaced in the first place.
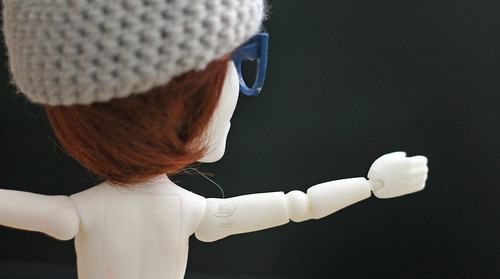 |
| Shoulder fit, grip hand attaches nicely. |
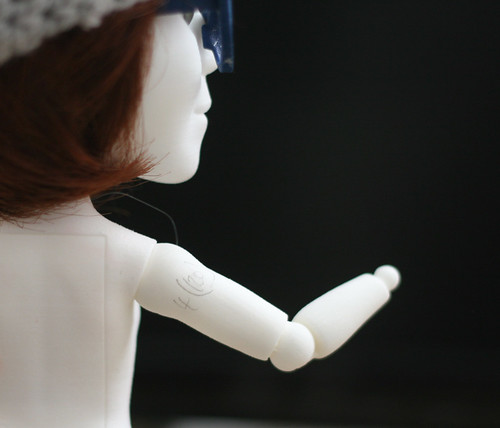 |
| Assessing movement at the shoulder. |
The MORA was also assessed in its ability to support weights. Results demonstrated comparable strength to the existing Makie arm of our test subject at the AAA and AA battery level.
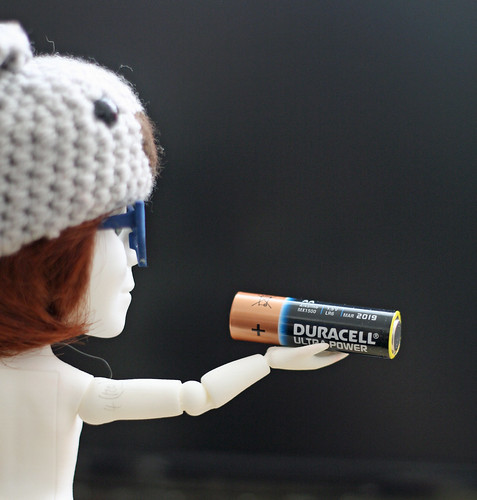 |
| No sagging here. Keep it up, Dr Melchie! |
Conclusions
Our experiments have demonstrated that at a temperature in excess of that thought to be tolerated by Makie components, for a length of time that some would call 'excessive', we cannot confidently demonstrate any loss of function in or degredation of Makie parts. There is no evidence of shrinkage; parts boiled for up to two hours still integrate perfectly with a non-boiled Makie with good holding of shape, structure and flexibility. This provides excellent evidence that a Makie could come through a domestic dyeing process at a lower heat for a lesser time unscathed.
Similarly, our experiments with the MORA have provided evidence that there is no immediate damage caused to the 'non-detachable' elbow joint by exposure to temperature and heat for far in excess of those used in the dyeing process. It is probable that our findings can be extended to the other 'non-detachable' joint, the knee, although further experimentation on this precise point would be desirable.
It must be mentioned, however, that these experiments do not account for potential hastening of loss of function over time. Future experiments involving the MORA component will allow for assessment of this, and will be reported at a later date.
Although our experiments have obvious limitations, we feel we can confidently predict that there will be limited damage to Makies from subjecting them to dye processes, although such procedures are obviously taken at the Makie Wrangler's risk.
 |
| Shrinkage? What shrinkage! |
TL;DR: I boiled bits for 2 hours. The arm still worked fine and fitted perfectly onto Melchie. There was no shrinkage evident and the joints at shoulder, elbow and wrist remained tight and able to hold a pose against resistance). I don't know if the boiling will lead to longer term problems; have to have a look at that in 6 months time, but I'm leaving the boiled arm on Melchie for a bit to see what happens.
I don't think there's going to be a problem with home-dyeing Makies, especially as you'll be using lower temps and shorter times.