Showing posts with label accessories. Show all posts

Wednesday, 3 April 2013

A lazy sort of day.

There's not a lot of productivity going on around here today. I've been working late shifts the last couple of days, which means getting home at 3am, and I'm on a night tonight, so today is all about the loafing.

Happily, our new furniture arrived to perfectly facilitate the art of not doing very much.

Lazy sort of day
Izzy and Tiny Bear find a sunny spot to compare travelling tales. 

Chilling in the Lab
Tea and surfing in the lab
This little set was a lucky find on evilBay. It's a bit grubby in places, so I'm thinking it could use a lick of white paint and some floral patchwork cushions... or is that a bit too twee?

Friday, 22 February 2013

Yay, good post day!

Today in the post there was a...

Pretty dress.
Good Post Day


Stripy jumper.


Good Post Day


Selection of customising things.


Good Post Day


Yay for nice post days!

Wednesday, 26 December 2012

Merry Makiemas!

We made it to Christmas Day!

What with all the Dr-Whoing and cooking and eating and falling asleep on the sofa, we managed to have a lovely, quiet and restful day. The girls' new glasses got painted up in time, and have been declared 'perfect'.
Untitled
Peace on Earth and Goodwill to all Makies!
Unfortunately today, Plink and Melchie decided to get out their presents to each other...
Untitled
To the DEATH, Melchie Vader!
... I can see a veto fast approaching...
Untitled
Haaar, Plink Skywalker! You shall not better me!
Oh help. Anyone know how to switch a light sword off?


Friday, 14 December 2012

New Specs

Freshly arrived from MakieLab today and waiting for a paint job. We shall look GLAMOROUS this Christmas!

Wednesday, 28 November 2012

Okay!

Yes yes yes. I know. I said some Makie love was needed...

...but then these wellies arrived in the post and... eeerm...

IMG_9849
Splashy wellies and bright red brolly, yaay!
Doesn't she look fab though?

Sunday, 4 November 2012

Movember!

If you're walking down the street in the next month and happen to see a gentleman with dodgy-looking facial fungus, panic not, for it is the month of Movember!

Movember
Rakish angle?
This charity endeavour encourages gents to be sponsored to grow and groom a moustache for a month, whilst conducting themselves as absolute gentleman. It's very popular amongst doctors, so I'll be alternately giggling at my colleague's efforts and reaching into my pockets for donations until the first of December when (hopefully) they'll be getting rid of them.

Movember

The Makies had to get in on the act, of course, and badgered me for Mo-onna-stick. 

Movember
A Mo for every occasion!

Not sure the Blythes are impressed.

Movember


Friday, 2 November 2012

Tuesday, 30 October 2012

Woooooo!

Huzzah! Our spooky order has arrived from Makie Lab!
Spooky jumpers
Aspen needs some clothing of her own... 
There were a few more things in the bag... watch this spooky space!

Sunday, 21 October 2012

Steamplink and Madame Von Melchie

Ahahahaaa!

Finally, I can let you into the sekrit of the costumes we've been working on for the last month!
Steamplink and Madame Von Melchie
Just put some gears on it and call it steeeeeeeeempunk!
Steampunk is fantastic, as far as I'm concerned. I've got a whole Pinterest board devoted to the collecting of steampunky ideas, and I've been dying to make a Makie-sized steampunk costume for ages. Happily, the Makie Meet gave me the perfect excuse to make two!

Here's the Steamplink. Obviously involved in the science side of things, she's probably an airship engineer or the like.
Steamplink and Madame Von Melchie
Okay, yes. The gears have no purpose. So hit me with sticks. 
Her boots and belt are from Collectible Kitbash and are seriously high quality. The boots have even got hobnails on them!
Steamplink and Madame Von Melchie
Up, up and awaaaaaaay!
Madame Von Melchie is more of a lace-and-arsenic sort.
Steamplink and Madame Von Melchie
Shall we dance? Or shall I poison you? Either way is good...
Her hat is essentially felt, fabric, glue and more glue. The skirt has wire in the hem to help it hold its shape. There's a 3-layer bustle on the back, which is happily not held together with glue. That's a chicken feather in the hat, by the way.
Steamplink and Madame Von Melchie
No, she wouldn't take off the fluffy bunny slippers.
I'm delighted with the costumes, especially Plink's wings and goggles. Many huge hugs to the Jo for sending me the watch faces!


Wednesday, 10 October 2012

Paper Hat: The Tutorialinginginging...

Goodness. We're going to end the run of hat-based tutorials and postings soon, I promise. It's probably something to do with the change in the weather! As the evenings draw in and the wind gets... erm... windier... there's nothing better than curling up and making some outerwear!

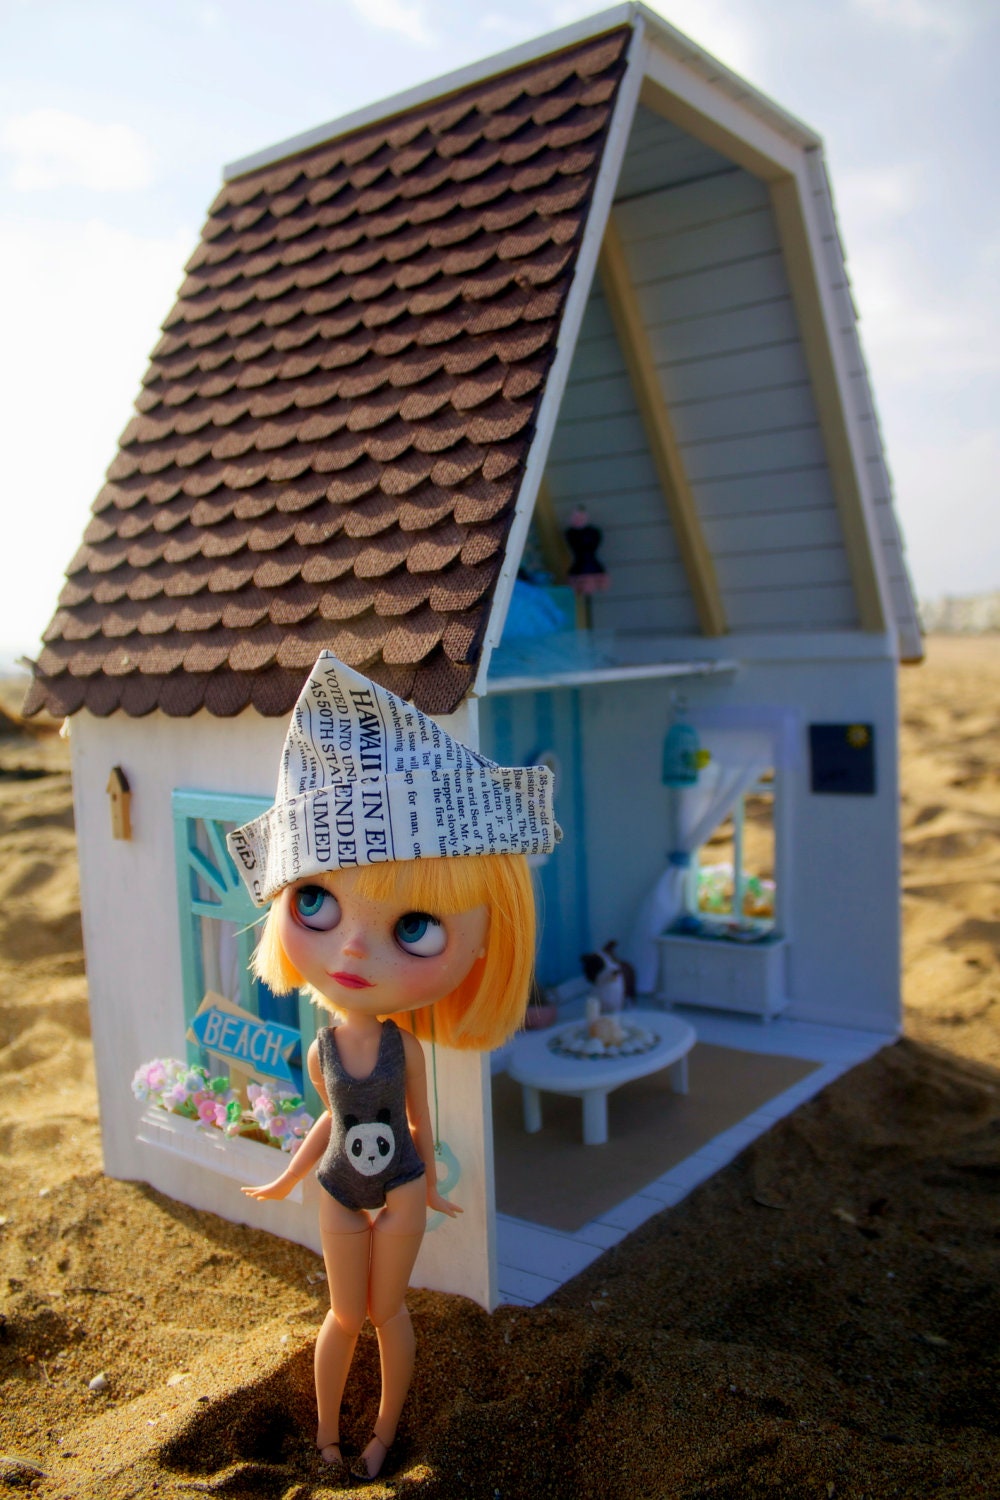
Anyway. As promised, here's a guide to making your very own paper hat, Makies for the wearing of. This is adapted from a classic paper hat fold you can do with a £5 note, either for leaving as a pretty tip or for annoying bus drivers. Hahaha.
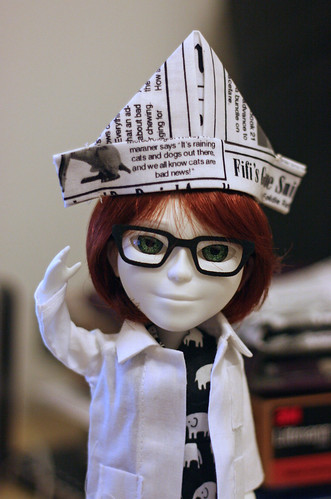
'loes Sailor
Smart, eh?
You will need:

  • Fabric measuring 12.5cm by 20.5cm (roughly 5" by 8 1/4")
  • Iron and ironing board
  • Needle and thread
  • Fray check
  • Scissors
Depending on the wibblyness of your fabric (technical term), you might need to interface it for added stiffness (fnaar). I would advise that you fold up a test hat and see what your fabric is going to do; although feeling flimsy when flat, the quilting cotton I used is surprisingly sturdy once folded and interfacing is really not needed.

Okay! Let's get folding. First thing, a warning:


You will be using a iron to crease all of your folds. Although you could use the heat only, you will most likely need steam to set the creases. The steam shoots out in all directions. 
You are very, very likely to get burnt fingers if you're not paying attention to what you are doing! 
Do not attempt to make these hats with small children, pets or wayward Makies distracting you! 


Crystal? Right. Read through all the steps, then have a go. If you're not clear on how the folding works, try it with a piece of paper before you move on to the fabric.

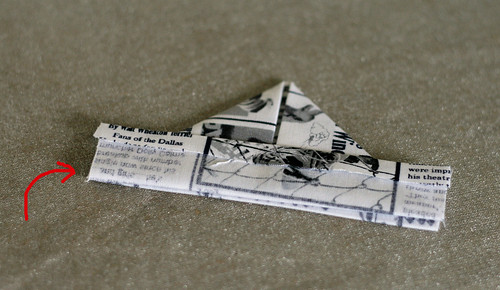
First, lay your fabric face down on the ironing board. Fold over 0.5cm ish at each end. This gives you a nice finish on the bottom opening of the hat.
Paper Haaaaatses
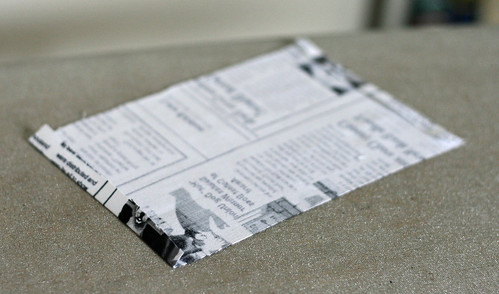
Flat, flat, flat. Fold ends and iron.
Fold the fabric in half, pattern out. Iron the fold. Lay folded fabric on your ironing board, opening towards you.
Paper Haaaaatses
Opening at the bottom, or you'll not get into your hat. 
Fold in the corners and iron flat.
Paper Haaaaatses
Find the middle first!
Bring the open edges of the fabric up over the triangle. Iron. It's easier to do one side, then flip the hat over and do the other.
Paper Haaaaatses
Opening still towards you, yes! 
Fold the nice finished edge down to make the outside bottom of the hat. Iron. This is where you're most likely to burn yourself.
Paper Haaaaatses
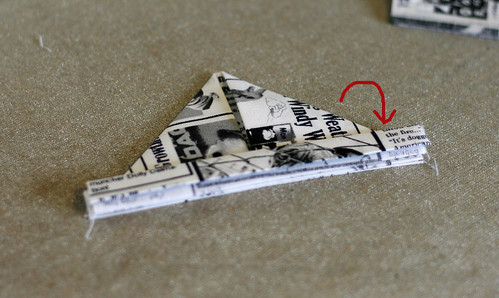
Basically fold the flat bit in half, so's there's a nice finish. Flatten with the iron. 
Congratulate yourself on having some fingers left. Switch off the iron, breathe a sigh of relief.
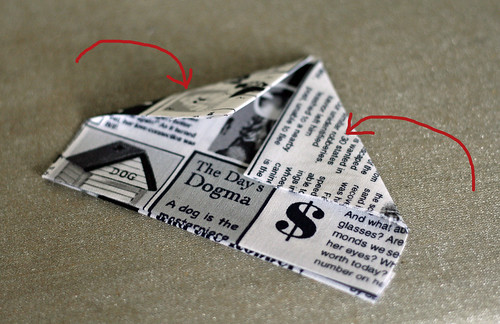
To finish the hat, you need to do a few little sewing stitches at the red dots. I just overcast a couple of times and make sure it's secure. For a smart finish, trim the edges marked by the arrows and apply a little fray check to stop... well. Fraying.
Paper Haaaaatses
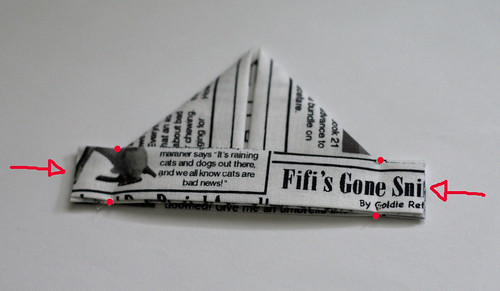
Stitch through all layers at the dots to hold the hat together. Trim and fray-check at the arrows.
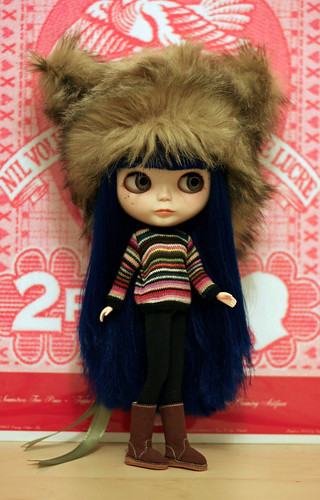
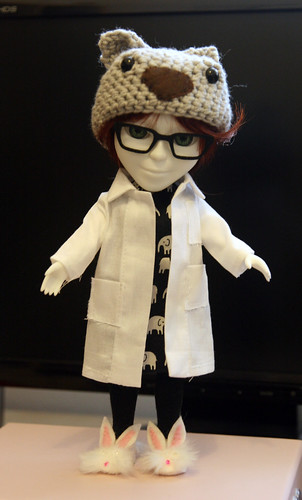
Hats don't have to be just one size! As long as you keep the proportions, you can make any size you like. The tiny hats started off about 7cm wide and have got a hairgrip stitched into the bottom to keep them in place. They could do with a little wire in the brim to hold them open... time to experiment!
Plink, play nice.
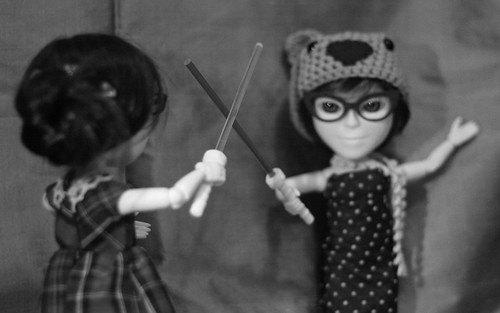
"Little haaaaaaaaatses!" "Hey! Plink! Play nice!"


Sunday, 7 October 2012

Hat stack!

Yup, it's been a weekend of non-stop crochet action. We're just unbearably cool like that.


These aren't all just for us, you know... *mysterious face*


Friday, 5 October 2012

Wednesday, 3 October 2012

I am so good to them...

Following Melchett's admiration of the paper hat, I had to track down some newspaper print fabric to make her her own version. 


Excuse the blurry photo, it's a bit late for such shenannygoats!

I'll be posting a tutorial for this once I've figured out the ideal starting size rectangle of fabric. This one is too tall in the crown.

If you want your own newspaper print fabric, there's a variety available here. I purchased a fat quarter, which is more than enough for a few hats... guess I might have something to swap at the Makie Meet after all! 

Tuesday, 2 October 2012

Melchie vs Etsy

Hullo! Melchett here.

Since getting the new laptop (thanks, human's unattended credit card!) Plink and I have been having a good look on the internet for other things that we could possibly purchase. Today we hit up Etsy and had a rummage for some top Makie desirables.
Surfing
Got coffee. Got doughnut. Got a BEAR HAT. Locked and loaded!
First up, we reckon this pattern book would make a great present for our human! Loads of trousers, shirts and coats. Apparently, if they fit the big-headed dolly with the weird eyes, they'll probably fit us.

From MeMeCraft on Etsy
Next, this cute little dress. I'm not so keen, Plink think's it's awesome.

One of many gorgeous designs by LoveBlytheDoll
A fancy jug like this would make our drinking evenings far more fun, obviously. This is hand blown glass, would you believe?! The colours! The pattents! The SIZE!
Completely astounding work by Kivaford
Oh, and we'll have this for the lab too.

Finally, here's one to break the bank...
You've got to click through to this listing to see all the superb details.
Fantastic work by MyDeliciousBliss
No, it's not a daft dolly in a silly hat, it's a completely gorgeous, fully-furnished des-res of Makie proportions, with sofa, fireplace, cosy chair and curtains! Personally if I could have one bit, it would be the hat. But hey, I think I'll just press for the whole darned lot.

Right! Off to the B+Q website to buy the human some woodworking tools for her birthday. Yeah!


Sunday, 30 September 2012

Good grief...

Hullo and welcome to the lab!
Is there something on my feet?
(She won't take the bear hat off you know. I've tried.)
... huh... what's that? There's something on my feet?
Is there something on my feet?
(Bears, elephants and bunnies on one Makie? Surely some sort of record.)
Oh... these are just my EXTREMELY AWESOME FLUFFY BUNNY SLIPPERS.
Is there something on my feet?
(I'm a medical professional and everything. I'm getting too old for this. *sniffle*)
Oh yeah!

Saturday, 29 September 2012

Fuzzy Grey Combo

We're going all Autumnal here at the Welsh Institute for Makie Sciences today. Whilst I'm indulging in a bit of nesting (soup, home made bread, gentle housework pootling, cups of tea and making up fresh beds), Plink decided it's time to show off her fuzzy grey combo set.
Fuzzy Grey Hat
Light's not bad at this time of year. 
Melchett's not a bad photographer, I have to say.
Fuzzy Grey Hat
O hai!
Oh, now that's just cheesy.

Don't fall off, Plink!
Fuzzy Grey Hat

Thursday, 27 September 2012

Tutorial: Making the Fuzzy Grey Hat


Well, I've published one crochet pattern on the blog, so I might as well cement my descent into middle-age-ness by publishing this one too...

Fuzzy Grey Hat
A dodgy photo requiring changing to B+W? NEVAH! 

To make your very own Fuzzy Grey Hat, you will need:
  • 4.0mm crochet hook
  • Fuzzy Grey Yarn! I used a skein of Debbie Bliss Alpaca that Bagpuss the cat had decided to have a party with some time ago. He's not yet been forgiven. It took well under 1/2 a skein to make this hat. 
  • Scissors.
  • To know how to do a magic loop cast-on, single and double crochet.
Once again, I'm not going to be teaching you how to crochet. There are some excellent books out there on the subject (see Bear Hat post for details) or loads of videos on You Tube for you to peruse. I find crochet much easier to knitting and it was really, really fast to pick up. 

Here we go then... arm yourselves. Have a read through all of the instructions before you start... 

Create 6 single crochet stitches into a magic loop. Pull the loop tight. 
Increase [Inc] all six stitches using single crochet; this means you work two single stitches into every stitch, giving you a total of 12 stitches.
Single crochet 1 into the first stitch, then Increase 1 into the next stitch around the 12 stitches [Sc1, Inc 1]  

For the next round, you're first going to chain 3 stitches. Then work in double crochet in the increasing pattern of  [Dc 2, Inc 1]. Your first double crochet stitch will be into the 4th loop from the hook (i.e don't work into the chain you've just created). For the increases, simply work two double crochet stitches into the same loop of the stitch on the row below.

Next round, back to single crochet: [Sc 3, Inc 1]
Next round we're doubling! Remember to chain 3 to start, then [Dc 4, Inc 1] 
Next round! Singles again. [Sc 5, Inc 1]
Increasing done, phew! Chain 3 stitches and work a round of all double crochet, then a row of all singles to finish. Tie off and weave in ends.

You may find you want less height on the hat than this; if you do, leave out the last doubles and just work another single round.
For a more snug fit, you can take a decrease at a couple of points in the last two rounds. I did this in the double row at 2 opposite points.

Now have fun embellishing your hat. I think a cluster of beads would look great... or how about covering the whole darned lot in sequins? Rock and roll! 

Wednesday, 26 September 2012

Fuzzy Grey Hat

It was clear that I wasn't going to get away with failing to provide the Plink a hat, given Melchett was posessed of a leet mad bear one.

The verdict was that something 'snuggly but classy' was required, and the fuzzy grey hat was born.
Fuzzy Grey Hat
Plink practices her Boden catalogue pose
Plink's elected to wear it for the moment with her crystal hair pins (originally designed to stick in floral buttonholes and scavenged from a wedding earlier this year) clustered for decoration, but she's eyeing up my bead collection. I don't think it'll be long before interchangeable embellishments are demanded!

I'm working on a matching scarf at the moment. Hopefully a snuggly ensemble perfect for A/W2012 will be complete by the weekend.

Monday, 24 September 2012

Tutorial: Making the Bear Hat

No sooner was the Bear Hat posted on the Makie Forum than a pattern was demanded!
Wet Sunday
Rawr!
I'm not going to go into how you crochet here; bigger brains than mine have produced some really good books on the subject. The Happy Hooker by Debbie Stoller is how I taught myself, and Creepy Cute Crochet is a really good introduction to simple amigurumi techniques, which is how the Bear Hat was created.

You will need:
  • 4.0mm crochet hook
  • Aran weight yarn (I used Debbie Bliss Cashmerino Aran, which is all fuzzy)
  • Scissors
  • Felt Scraps, co-ordinating thread to stitch them on with. 
  • Teddy bear eyes, these are 8mm ones
  •  Patience and the ability not to crochet yourself to your work. 
Pattern as follows: 

To make the hat:

Create 6 single crochet stitches into a magic loop. Pull the loop tight. 
Increase [Inc] all six stitches; this means you work two single stitches into every stitch = 12 st. 
Single crochet 1 into the first stitch, then Increase 1 into the next stitch around the 12 stitches [Sc1, Inc 1] 
For the next round [Sc 2, Inc 1] 
Next round [Sc 3, Inc 1]
Next round [Sc 4, Inc 1] 
Next round! [Sc 5, Inc 1]
Work around the brim 3 or so times until your hat is the depth you want.  Tie off and weave in ends. 

For the ears:

Decide where you want the ears to be placed, then working in the holes between the stitches of the hat, pick up 4 single crochet stitches for the base of each ear.
Work backwards and forwards as follows:
First row: Chain 1 [Sc 1, Inc 1, Inc 1, Sc 1] = 6 stitches
Next row: Chain 1, Sc all stitches. 
Next row: Chain 1 [decrease 1, Sc 2, decrease 1] = 4 stitches, tie off and weave in ends.

If you're not happy picking up stitches, then you could always work the ears separately off of a chain of 4 stitches, then sew 'em on afterwards. 

Wet Sunday
I can bear-ly believe it!
Once the ears are on, all you need to do is cut your nose shape and stitch it on, then push the eyes through the holes between the stitches. Have fun adding whiskers, changing ear shapes and experimenting with different colours!

It would be pretty easy to make ear flaps for these hats! You just pick up stitches along the brim, work back and forth for a few rows, then decrease at the edges to a point. Finish off by adding a doubled strand of contrasting colour wool and braid to a pretty pleat. 

Sunday, 23 September 2012

Wet Sunday

Take one thoroughly soggy Sunday afternoon, mix in a cup of tea, a flapjack, some wool scraps, a crochet hook and about 6 episodes of Spaced on Netflix...
Wet Sunday
The knitting needles are misleading. We didn't use them, precious.
And get yourself a thoroughly funky two-tone infinity scarf...
Wet Sunday
Snuggly jumpers are going to be the way forwards, I can tell. 
And a highly sophisticated BEAR HAT.
Wet Sunday
Oh yes. Rawr. 
Wet Sundays are my favourite.