Umm... I'm still alive, honest. Really, I am. It's end of Real Job rotations at the moment, so that unfortunately means that time is on the short side as there are loose ends to tie up, and there's also an unfortunate rota collision in the works that means I'm working two weekends in a row (boo hiss)
To cheer myself up, I went online fabric shopping. The first parcel was waiting for me when I got home today; a gorgeous hairbell print floaty light rayon, a silky jersey dragonfly print and a soft blue jersey. I'm thinking two comfortable dress-them-up-or-down tops and possibly a jersey skirt... We'll see how brave I'm feeling!
Monday, 30 July 2012
Thursday, 26 July 2012
Plinkography: Wildlife Photographer
Hullo and welcome to our second session of Plinkography!
This week, my camera and I took a trip to a local wildlife reserve. Apparently it's got lots of rare stuff, but there were so many children running around and yelling their heads off, it had all fled to the hills. Huh.
Here are my favourite shots. You'll note that I don't count humans as wildlife.
This is a damselfly.
This is a pink flower. It's pretty.
This is a butterfly. It's a brown one.
This is a duck. Ducks are ace.
More Plinkography soon!
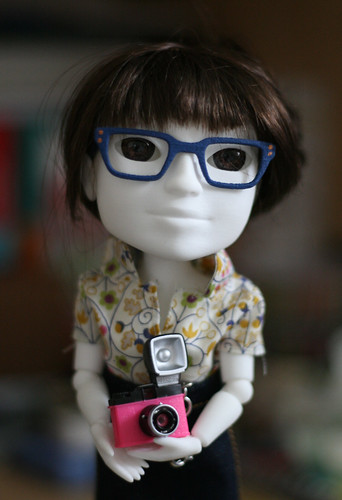 |
| Intrepid Plinkographer |
This week, my camera and I took a trip to a local wildlife reserve. Apparently it's got lots of rare stuff, but there were so many children running around and yelling their heads off, it had all fled to the hills. Huh.
Here are my favourite shots. You'll note that I don't count humans as wildlife.
This is a damselfly.
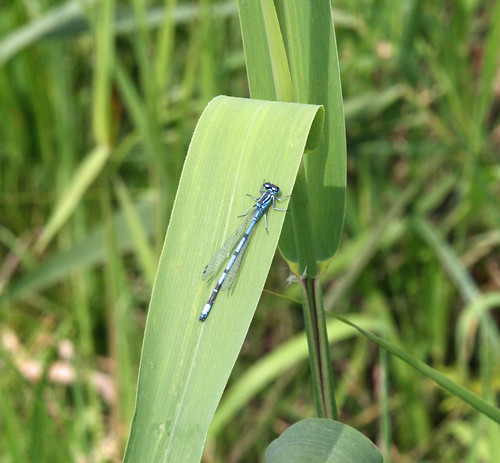 |
| Blue. Flappy. |
This is a pink flower. It's pretty.
 |
| Pink, non-flappy. |
This is a butterfly. It's a brown one.
 |
| Brown, flappy. |
This is a duck. Ducks are ace.
 |
| Brown, flappy. Wait... it's a butterfly too? |
Tuesday, 24 July 2012
Tutorial: Sunny Sundress Variations
Yesterday, we learnt how to make a basic sunny sundress.
Today, I'll demonstrate a couple of simple variations to give a different feel to the outfit. They're all achievable with about two minutes of your time, a little scrap of ribbon and a needle and thread.
Firstly, why not stitch a bit of ribbon to the centre front to make a halterneck? The dress is still easily removable (pop your Makie's head!), and if you only secure it loosely, you can simply snip it off if you get bored with it.
How about converting to a sweetheart neckline?
All you need to do for this look is to pinch together the fabric at the mid-bust and take a couple of stitches to hold it in place. In the picture below, I've also added a wide-placed ribbon halterneck. This gives a 1950s 'wiggle dress' look.
There are so many things you could do! Why not try adding straps, tiny buttons, little silk flowers or even a few sequins?
Looking forwards to seeing all your variations; link me to your photos!
Monday, 23 July 2012
Makie Me a SUNNY SUN DRESS!
Aaah, the birds are singing, the sky has shed its usual sort-of-greyish colour for a gloriously glowing blue, and humans and Makies alike are out enjoying toasting their bones and, of course, looking faaaabulous at the same time!
This tutorial will help you create a stunning sun dress with multiple possible customisable variations. It's so ridiculously simple that you can stitch one up by hand in half an hour... and probably in less than 5 minutes by sewing machine. But who wants to be inside with a sewing machine today, I ask you?!
I used some cotton scraps for this version but just about any fabric you've got lying around will be fine. If you're one of these people that doesn't have fabric lying around (weirdo), you can pick up 'fat quarters' of all sorts of fabric online. These are the perfect size for creating Makie clothing and are generally very economical; prices range from 50p to £4 ish. Quilting cotton is excellent for beginners. It's easy to sew, cheap and comes in all sorts of exciting prints.
Here's most of the things you'll definitely need, and some things you really, really won't:
Essential supplies:
Optional but highly recommended supplies:
 |
| Prof Plink prepares to leave the library and head into the great outdoors. |
This tutorial will help you create a stunning sun dress with multiple possible customisable variations. It's so ridiculously simple that you can stitch one up by hand in half an hour... and probably in less than 5 minutes by sewing machine. But who wants to be inside with a sewing machine today, I ask you?!
I used some cotton scraps for this version but just about any fabric you've got lying around will be fine. If you're one of these people that doesn't have fabric lying around (weirdo), you can pick up 'fat quarters' of all sorts of fabric online. These are the perfect size for creating Makie clothing and are generally very economical; prices range from 50p to £4 ish. Quilting cotton is excellent for beginners. It's easy to sew, cheap and comes in all sorts of exciting prints.
Here's most of the things you'll definitely need, and some things you really, really won't:
 |
| The cake. OH, THE CAKE |
Essential supplies:
- Fabric.
- Thread in a matching (or contrasting!) colour.
- Needle, either hand or attached to a sewing machine.
- Pins
- 1/4 inch wide elastic, about a 6 inch length (not shown cause I'm a muppet)
- Ribbon
Optional but highly recommended supplies:
- Penny Arcade D&D podcasts (for bringing the Jim Darkmagic Magic)
- Earphones so's not to upset the neighbours with the above.
- Glasses which are the correct prescription instead of your six year old sunglasses which are not, therefore you cannot see out of them properly, isn't it time you got some new ones, you plonker.
- Graze.com "High Tea" series carrot cake and complimentary teabag.
- A napkin to cover your horrible garden furniture, which was in the shed when you bought the house (the weather hasn't been nice enough this summer to consider replacing it!
OKAY!
First, cut your fabric into a 16cm by 16cm square. I find it easier to make a paper template to cut around, although you might like to draw straight on the fabric with some tailor's chalk.
Making sure that your fabric is the right way up (so your birdies aren't flying in a funny direction), fold over 1.5cm at the top edge and pin. Sew close to the free edge to create a little tube at the top of the fabric; this forms your elastic casing and the top of the dress. Remember that your stitches will show on the outside here, so make 'em neat as you can!
Next, fold in half, right sides together. The open edge will be the back of the finished dress. Sew along the back seam, stopping just below the elastic casing.
 |
| Fold in half to make the back seam. S top sewing just below the elastic casing (facing towards us in this picture), leaving the tube open. |
Turn up the bottom of the dress and stitch a neat hem. If you're feeling particularly lazy, you could glue this with some fray-stop. (If you're machine-sewing, you might find it easier to hem before stitching the back seam because of the small diameter tube.)
Turn the dress the right way around. Feed your piece of elastic through the top casing. It may be helpful to put a safety pin on the end of the elastic to give you something to pull through.
With both elastic ends sticking out of the dress, slide it on to your Makie and tie it above the bust so's it's nice and snug. Snip off the excess. The dress gathers at the back and your join will be nearly invisible, yaay!
 |
| Make sure you've got enough stretch in the elastic to get the dress on and off! Snip off the loose ends close to the knot. |
Nearly there! No woman likes looking like a sack of potatoes, so add a ribbon belt for some waist definition. You can simply tie this on, or add snaps and elastic. I've just stitched mine at the back.
And there you have it! Celebrate and bask in the sunshine!
The best thing about this dress is that it gives you a great base for some customisation and versatility. Try altering the skirt length; cut your fabric as a 16cm by 20cm rectangle for a maxi dress, or you could go to 12-14cm (depending how daring your Makie is!) for a miniskirted version. Play around with different fabrics, different waist ties and contrasting coloured stitching... or if you're really brave, why not try some embroidery?
Tomorrow, I'll show you a couple of neckline variations that'll be great for adding a bit of individual style, so don't throw away the rest of that ribbon!
Tomorrow, I'll show you a couple of neckline variations that'll be great for adding a bit of individual style, so don't throw away the rest of that ribbon!
Labels:
Couture,
fat quarter,
Makie,
making,
patterns,
Plink,
sewing,
sunny sun dress,
tutorial
Sunday, 22 July 2012
Results are in...
So we had one vote for the top hat, one for the kimono top and one for the sun dress. Which leaves me with a lot of choice! Huzzah!
Given that the big firey orb in the sky has decided to appear this weekend, we're going to make...
The top hat is definitely a project I'm keen on tutorialising in the future, but it's going to be a lot more technical than my brain was prepared to wrestle with in this heat. Oh to live near the sea rather than a great big muddy tidal estuary...
...anyway. Tutorial up tomorrow! If you're feeling super-keen, you could prepare a 16 by 16 cm piece of your chosen fabric, some pins, a bit of narrow elastic and a needle and thread in advance.
Given that the big firey orb in the sky has decided to appear this weekend, we're going to make...
 |
| Hooray for sunny sundresses and sneaky teaser photos! |
The top hat is definitely a project I'm keen on tutorialising in the future, but it's going to be a lot more technical than my brain was prepared to wrestle with in this heat. Oh to live near the sea rather than a great big muddy tidal estuary...
...anyway. Tutorial up tomorrow! If you're feeling super-keen, you could prepare a 16 by 16 cm piece of your chosen fabric, some pins, a bit of narrow elastic and a needle and thread in advance.
Saturday, 21 July 2012
Tutoriaargh
Yup, there's going to be a new tutorial soon, and it's up to you, my dear readers, to decide what we're going to make.
Choose from:
 |
| Prof Plink's Pencil is Poised |
Choose from:
- Kimono t shirt
- Top hat
- Shopping bag
- Sun dress (will require some sewing skillz)
- Prom-style dress (will definitely need to know one end of a needle from the other)
and either let me know in a comment or chuck a vote on the main Makie forum thread.
Happy clicking!
Tuesday, 17 July 2012
Project Runway, Makie Edition
Tim Gunn has nothing on us!
Today's challenge: recreate and reinterpret this faaaabulous vintage look, as modelled by Millie the Minx
Dr Duckie, designing for her model Plink, decided to keep the simple directional lines provided by the striped fabric, utilising a scrap of Paul Smith shirting fabric she's had floating around for ages. For a more modern look, she's updated the skirt, reducing volume. Lengthening to floor level gives this the option to be worn as a sunny-day maxi or an elegant evening look.
Dr Duckie adds contrast stitching for interest instead of the slightly more whimsical rick-rack of the original.
And in the finest traditions of Project Runway, the model has been sewn into her dress!
Am I through to next week, or is Heidi going to be sending me home?
Today's challenge: recreate and reinterpret this faaaabulous vintage look, as modelled by Millie the Minx
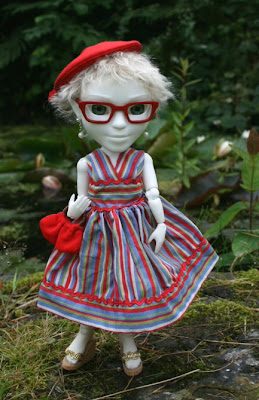 |
| Millie, rocking a handbag, beret and gorgeous stripy dress. |
 |
| Plink, modelling Dr Duckie's creation. |
 |
| Topstitching? Isn't that how you broke your machine last time? |
And in the finest traditions of Project Runway, the model has been sewn into her dress!
 |
| Yes, the back could be tidier. |
Thursday, 12 July 2012
Plinkography: Around the House
Hullo and welcome to what I like to call a session of Plinkography!
Today we're taking a look around the human'shovel house. I had hoped to show you the garden, but the Welsh weather is up to its usual tricks.
The birds don't seem to mind.
This is Bagpuss.
I don't think he likes me much.
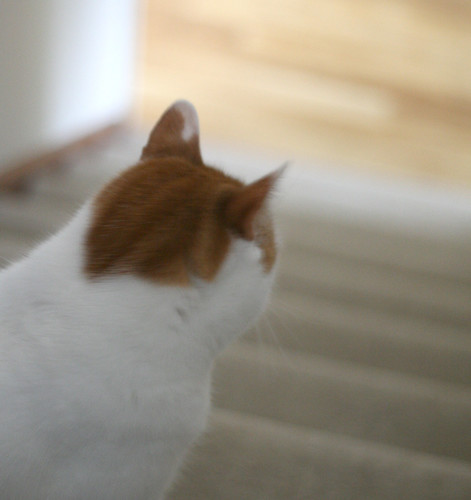
This is Pirate. He likes me even less.
This is my human. The jury is out on what she thinks of me. The other human is still out at work.
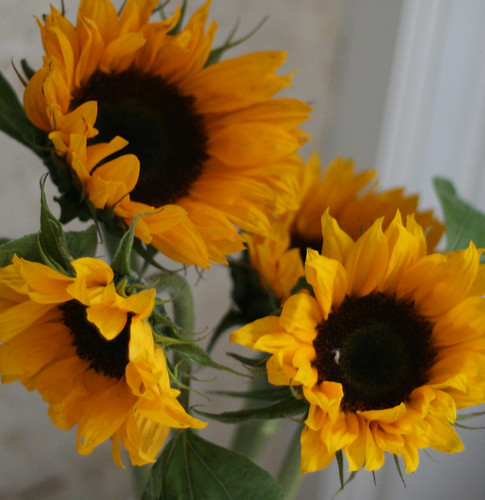
These are some pretty sunflowers. They're one of the nicer things here.
Taadaa! That's it for today's Plinkography tour. See you next time for more stunning shots!
 |
| Thanks for getting the camera, Fil! |
Today we're taking a look around the human's
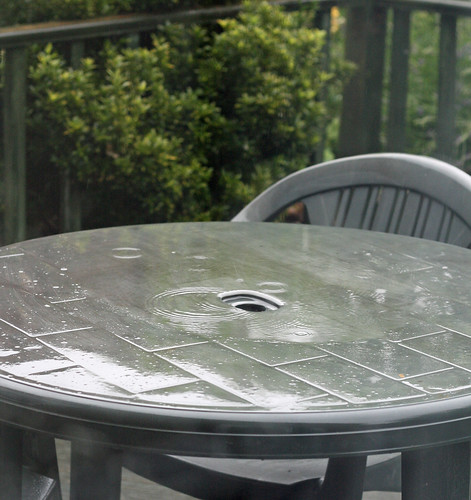 |
| Drip drip drip drip drip DRIP DRIP DRIP DRIP |
The birds don't seem to mind.
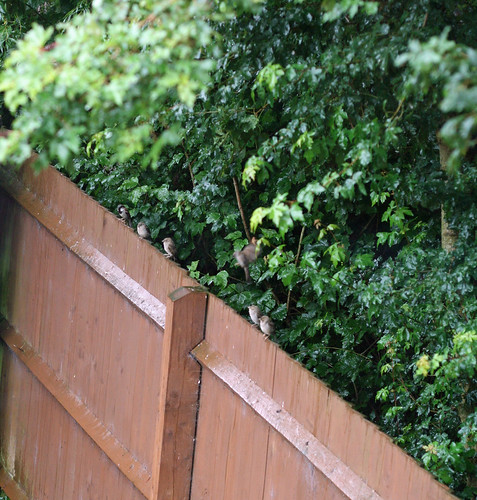 |
| There are LOADS of these little sparrows. Like, 40 or more. |
This is Bagpuss.
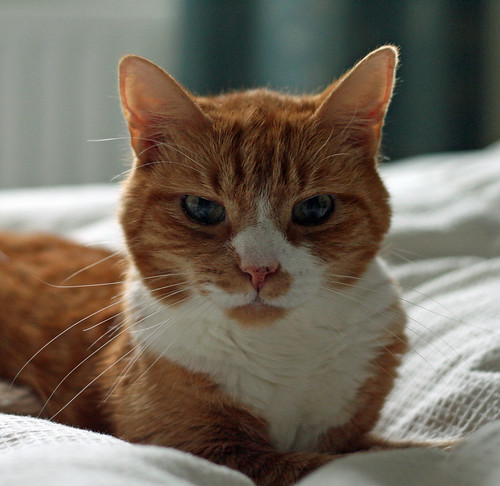 |
| Get. Out. Of. My. Sight. |
I don't think he likes me much.
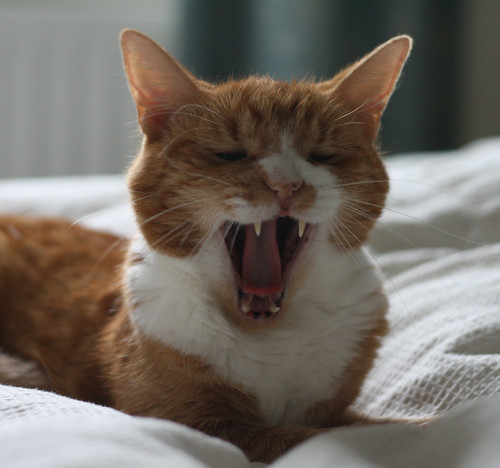 |
| Mrooooooooooooooowrl! |
This is Pirate. He likes me even less.
 |
| FLEE! |
This is my human. The jury is out on what she thinks of me. The other human is still out at work.
 |
| O HAI |
These are some pretty sunflowers. They're one of the nicer things here.
 |
| Pretty! |
Taadaa! That's it for today's Plinkography tour. See you next time for more stunning shots!
Tuesday, 10 July 2012
Monday, 9 July 2012
Effortless Elegance
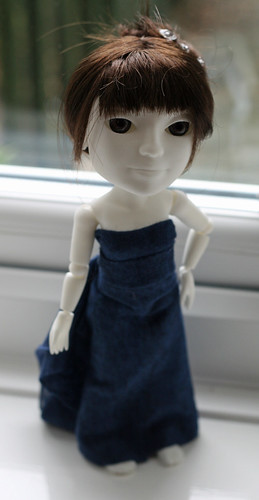
You don't need a whole host of draping, cutting and sewing skills to produce an elegant Makie Couture look; this design took all of five minutes to put together (and three of those were spent digging out the fabric).
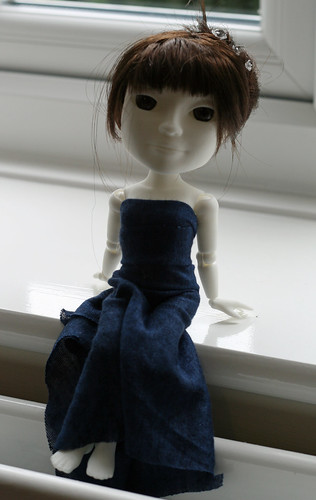
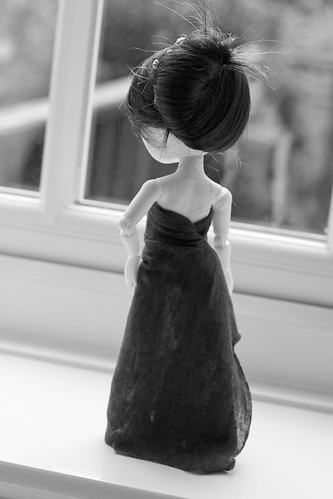
This slightly bustled strapless evening gown features achingly trendy unfinished edges, classic lines and is quite literally a rectangle of jersey fabric, twisted at the back and held in place by two dressmaking pins. Not a single stitch was sewn.
This photo shoot definitely illustrates that I've been around too many weddings this weekend.
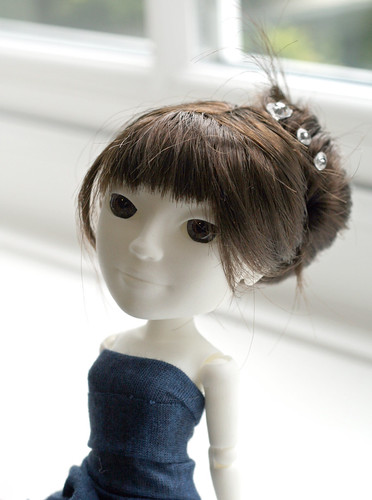
Although it did mean I got to snaffle the plastic diamond-topped pins from the corsages, which are perfect for Makie up-dos. Similar to constructing the dress, I've found I get a really good hold on the wig just by twizzling the hair and pinning in place. If only mine were so well-behaved.
So there you have it. Classyness and poise, all with a bit of fabric the size of a hanky and a couple of pins. Worth a go, yes?
 |
| Yes, we probably could have found a more classy posing location. |
This slightly bustled strapless evening gown features achingly trendy unfinished edges, classic lines and is quite literally a rectangle of jersey fabric, twisted at the back and held in place by two dressmaking pins. Not a single stitch was sewn.
 |
| Black and White makes everything look like a Vogue shoot. |
This photo shoot definitely illustrates that I've been around too many weddings this weekend.
 |
| Oh, what? At least I'm not asking you to do all the cheesy poses. |
Although it did mean I got to snaffle the plastic diamond-topped pins from the corsages, which are perfect for Makie up-dos. Similar to constructing the dress, I've found I get a really good hold on the wig just by twizzling the hair and pinning in place. If only mine were so well-behaved.
 |
| And twist and pin and done. |
Sunday, 8 July 2012
Haunt's Hold Couture Collection
Here's a gorgeous bit of Makie Couture that reminds me rather of a Ghost catwalk look.
This is Grisette, a Makie named after a courtesan who definitely knows how to pose for the camera. She's totally rocking the pink hair and this rumpled linen number. I love the simple lines, the unfinished edges and the slight flare to the sleeves. Great work, Michelle!
 |
| Grisette rocking the Mean and Moody look. |
This is Grisette, a Makie named after a courtesan who definitely knows how to pose for the camera. She's totally rocking the pink hair and this rumpled linen number. I love the simple lines, the unfinished edges and the slight flare to the sleeves. Great work, Michelle!
Saturday, 7 July 2012
Sewing for Humans: Sewaholic Cambie Dress
Weddings weddings weddings.
The long-suffering bloke's sister is getting married today, so we're all off for a bit of a party (Plink is not coming with me. Too many opportunities for utter mischief) and as usual, I've decided that whatever I'm wearing is going to be made by me.
Typically, I'd found the perfect fabric long before decided which pattern to use. It was a bit of a toss-up between some vintage Vogue...
...or a patten I'd used once before...
...or this rather off-the-wall number (thank goodness I didn't go for this, would not have been flattering)...
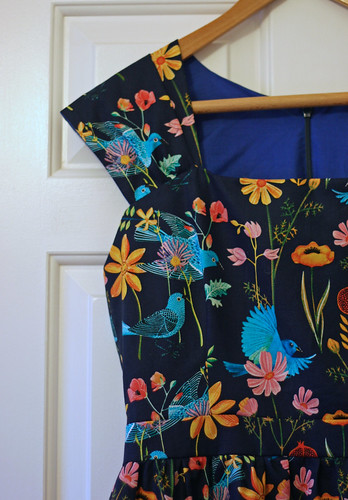
Then huzzah and hoorah, Sewaholic released their Cambie dress pattern. Perfect combination of party but not prissy and perfect for the fabric I had in mind with its relatively simple lines.
Exceptionally glad I took the time to make a muslin for this, the first fitting highlighted a lot of issues. Hardly surprising when you're putting an hourglass shape into a dress designed with pears in mind, especially when the hourglass is only 5ft tall and overly-blessed with bazingas and booty. This means I've got a narrow back in comparison to my front, a huge swayback, a relatively skinny waist and chunktastic thighs (hoorah for full skirts!).
So. After starting with a size 10 all over for the first muslin, I dropped bust dart point by about an inch, converted to square neckline, chopped 1 1/2 inches off of the height at the shoulders to stop back neckline gaping wider than the grand canyon, and widened waist darts for a bit of extra nip and tuck. 2nd fit muslin (now the lining) indicated I needed to take 1/2" off of the bodice length and drop the neckline by about 1/2 an inch, then do a bit more of a swayback adjustment. *Phew*.
The skirt is made of neither of the pattern options; it's basically two 'option B' front pieces (the back cut in two for the CB seam) gathered. I've got quite enough 'natural' volume at the back already without adding more). Zipper sloppily inserted by machine as I was using a borrowed machine with just a straight foot, then hand sewn to shell and lining fabrics.
The fabrics are probably a little too heavy for the gathered skirt for this to be worn as a day dress. For special occasions where a bit of poofyness isn't a problem, it looks fine. Have to say that the colours of this print are spectacular and the fabric stitches up beautifully and presses well.
Let's hope it gets through the day without falling to pieces! Needle and thread locked and loaded in the handbag just in case... more photos to follow, naturally.
UPDATE!
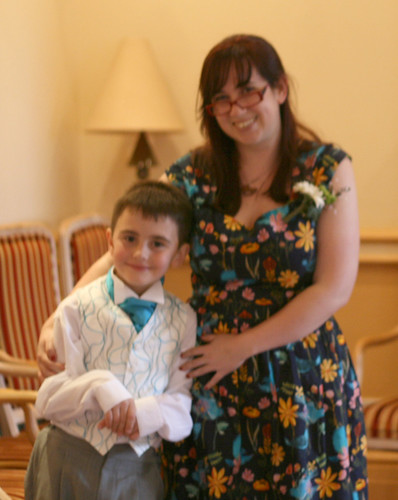
The dress survived, as did I. Unfortunately there are but two photos of me wearing it, and both of 'em are blurred to oblivion. Oh well, I'm certain some more will surface. Here's me looking less than glam following a tussle with my sort-of-nephew to encourage him to stand still.
The long-suffering bloke's sister is getting married today, so we're all off for a bit of a party (Plink is not coming with me. Too many opportunities for utter mischief) and as usual, I've decided that whatever I'm wearing is going to be made by me.
Typically, I'd found the perfect fabric long before decided which pattern to use. It was a bit of a toss-up between some vintage Vogue...
...or a patten I'd used once before...
...or this rather off-the-wall number (thank goodness I didn't go for this, would not have been flattering)...
Then huzzah and hoorah, Sewaholic released their Cambie dress pattern. Perfect combination of party but not prissy and perfect for the fabric I had in mind with its relatively simple lines.
Exceptionally glad I took the time to make a muslin for this, the first fitting highlighted a lot of issues. Hardly surprising when you're putting an hourglass shape into a dress designed with pears in mind, especially when the hourglass is only 5ft tall and overly-blessed with bazingas and booty. This means I've got a narrow back in comparison to my front, a huge swayback, a relatively skinny waist and chunktastic thighs (hoorah for full skirts!).
So. After starting with a size 10 all over for the first muslin, I dropped bust dart point by about an inch, converted to square neckline, chopped 1 1/2 inches off of the height at the shoulders to stop back neckline gaping wider than the grand canyon, and widened waist darts for a bit of extra nip and tuck. 2nd fit muslin (now the lining) indicated I needed to take 1/2" off of the bodice length and drop the neckline by about 1/2 an inch, then do a bit more of a swayback adjustment. *Phew*.
 |
| Yay, BIRDIES! |
The skirt is made of neither of the pattern options; it's basically two 'option B' front pieces (the back cut in two for the CB seam) gathered. I've got quite enough 'natural' volume at the back already without adding more). Zipper sloppily inserted by machine as I was using a borrowed machine with just a straight foot, then hand sewn to shell and lining fabrics.
The fabrics are probably a little too heavy for the gathered skirt for this to be worn as a day dress. For special occasions where a bit of poofyness isn't a problem, it looks fine. Have to say that the colours of this print are spectacular and the fabric stitches up beautifully and presses well.
Let's hope it gets through the day without falling to pieces! Needle and thread locked and loaded in the handbag just in case... more photos to follow, naturally.
UPDATE!
The dress survived, as did I. Unfortunately there are but two photos of me wearing it, and both of 'em are blurred to oblivion. Oh well, I'm certain some more will surface. Here's me looking less than glam following a tussle with my sort-of-nephew to encourage him to stand still.
Friday, 6 July 2012
Friday night kickback
Plink and I have done a couple of night shifts this week (hers seemingly involving squids and fusebox snakes... No, don't ask me, see twitter.com/profplink for details) and phew, we're ready for the weekend.
Tonight has mainly involved finishing off hand sewing on a dress I'll be wearing tomorrow and having a quiet drink.
Hooray for weekends!
Tonight has mainly involved finishing off hand sewing on a dress I'll be wearing tomorrow and having a quiet drink.
Hooray for weekends!
Tuesday, 3 July 2012
Reunion!
Huzzah and hurrah, the sewing machine and I have been reunited and it seems to be working perfectly again, yaay!
The other exciting thing that arrived is my copy of Alabama Studio Sewing and Design, which is (believe it or not) a guide to making couture jersey fabric clothing complete with full patterns. Although this was entirely purchased with my clothing needs in mind, Plink has been eyeing it up already... as well as the 2m of blue jersey in the stash upstairs.
Well, it's all going to have to wait. I'm on nights the next couple of days and I've still got to finish this dress for Saturday's wedding. Perhaps I could persuade Plink to do some hemming?
Monday, 2 July 2012
Experiment
Room-Clearing Properties of Popular Music
Professor P Makie and Dr D Monster
Welsh Institute of Makie Research, Monmouthshire, Wales
Abstract:
This preliminary study demonstrates the power of certain kinds of popular music to remove a) felines b) humans from the standard domestic living room. Subjects were exposed to visual and audio stimuli via a television set playing “Tina Turner, live in Amsterdam” (2005). Feline response time was fastest, resulting in hiding behind the sofa after 3 minutes and 35 seconds of exposure. Human response time was slower, yet more complete, leaving the room and taking the cat with him after 12 minutes and 23 seconds. Neither returned to the room whilst stimulus continued for a further 12 minutes. Parallels are drawn with exposure to reality TV shows and discussion focuses on possible ways to use this aversion to manipulate behaviour.
Subscribe to:
Posts (Atom)


