Showing posts with label tiny haaaatsssssss. Show all posts

Wednesday, 10 October 2012

Paper Hat: The Tutorialinginginging...

Goodness. We're going to end the run of hat-based tutorials and postings soon, I promise. It's probably something to do with the change in the weather! As the evenings draw in and the wind gets... erm... windier... there's nothing better than curling up and making some outerwear!

Anyway. As promised, here's a guide to making your very own paper hat, Makies for the wearing of. This is adapted from a classic paper hat fold you can do with a £5 note, either for leaving as a pretty tip or for annoying bus drivers. Hahaha.
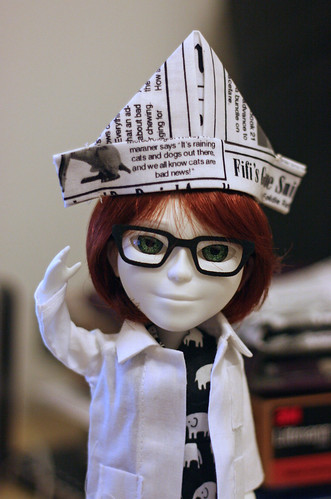
'loes Sailor
Smart, eh?
You will need:

  • Fabric measuring 12.5cm by 20.5cm (roughly 5" by 8 1/4")
  • Iron and ironing board
  • Needle and thread
  • Fray check
  • Scissors
Depending on the wibblyness of your fabric (technical term), you might need to interface it for added stiffness (fnaar). I would advise that you fold up a test hat and see what your fabric is going to do; although feeling flimsy when flat, the quilting cotton I used is surprisingly sturdy once folded and interfacing is really not needed.

Okay! Let's get folding. First thing, a warning:


You will be using a iron to crease all of your folds. Although you could use the heat only, you will most likely need steam to set the creases. The steam shoots out in all directions. 
You are very, very likely to get burnt fingers if you're not paying attention to what you are doing! 
Do not attempt to make these hats with small children, pets or wayward Makies distracting you! 


Crystal? Right. Read through all the steps, then have a go. If you're not clear on how the folding works, try it with a piece of paper before you move on to the fabric.

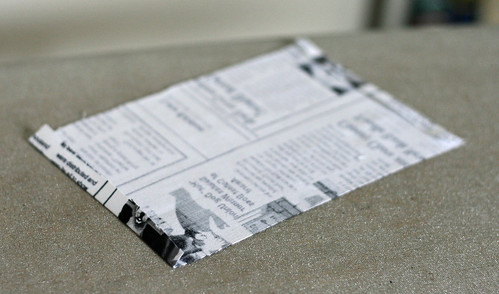
First, lay your fabric face down on the ironing board. Fold over 0.5cm ish at each end. This gives you a nice finish on the bottom opening of the hat.
Paper Haaaaatses
Flat, flat, flat. Fold ends and iron.
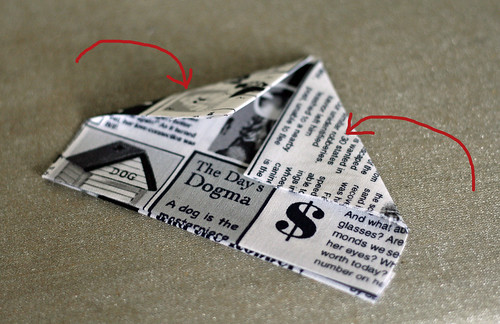
Fold the fabric in half, pattern out. Iron the fold. Lay folded fabric on your ironing board, opening towards you.
Paper Haaaaatses
Opening at the bottom, or you'll not get into your hat. 
Fold in the corners and iron flat.
Paper Haaaaatses
Find the middle first!
Bring the open edges of the fabric up over the triangle. Iron. It's easier to do one side, then flip the hat over and do the other.
Paper Haaaaatses
Opening still towards you, yes! 
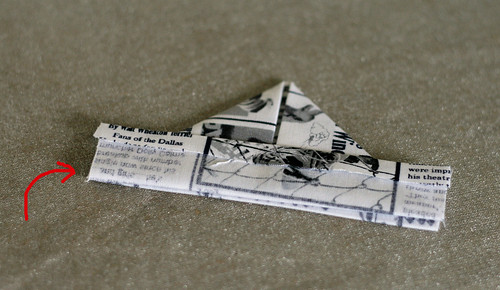
Fold the nice finished edge down to make the outside bottom of the hat. Iron. This is where you're most likely to burn yourself.
Paper Haaaaatses
Basically fold the flat bit in half, so's there's a nice finish. Flatten with the iron. 
Congratulate yourself on having some fingers left. Switch off the iron, breathe a sigh of relief.
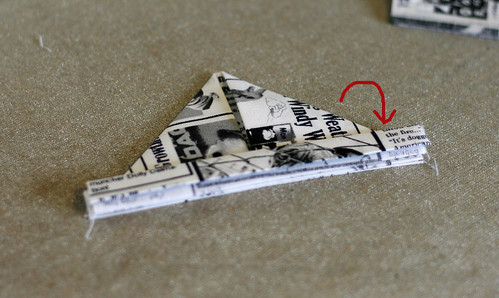
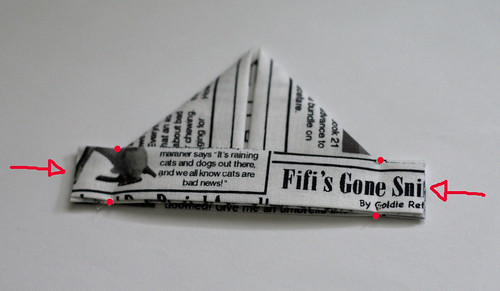
To finish the hat, you need to do a few little sewing stitches at the red dots. I just overcast a couple of times and make sure it's secure. For a smart finish, trim the edges marked by the arrows and apply a little fray check to stop... well. Fraying.
Paper Haaaaatses
Stitch through all layers at the dots to hold the hat together. Trim and fray-check at the arrows.
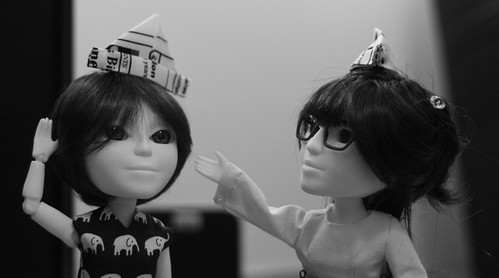
Hats don't have to be just one size! As long as you keep the proportions, you can make any size you like. The tiny hats started off about 7cm wide and have got a hairgrip stitched into the bottom to keep them in place. They could do with a little wire in the brim to hold them open... time to experiment!
Plink, play nice.
"Little haaaaaaaaatses!" "Hey! Plink! Play nice!"


Sunday, 7 October 2012

Hat stack!

Yup, it's been a weekend of non-stop crochet action. We're just unbearably cool like that.


These aren't all just for us, you know... *mysterious face*


Friday, 5 October 2012

Sunday, 26 August 2012

On the subject of face-ups.

In vanishing rapidly down the portal known as 'doll collecting' (which is, incidentally, not something I intend on doing. A couple of Makies is plenty!), I've noticed that as is always the case with something creative, the owners of the items just can't keep their hands off of 'em.

I have to say, I'm absolutely in awe of some of the work out there. A quick shuffle through the 'Blythe custom' group on Flickr and you can find examples of superb work from around the world.

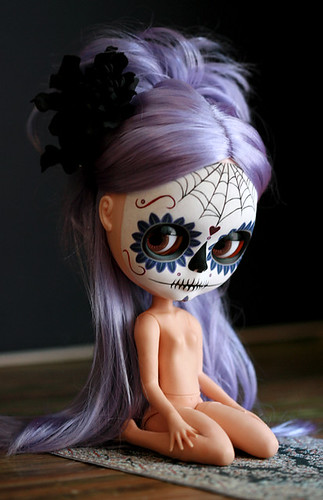
There are eyelids with dainty paintings, piercings galore, a whole host of vampires and these gorgeous calavera designs.

m calavera 008
M Calavera, by Kittytoes with kind permission.
Click the photo to check out her flickr, it's epic!
Of course, we can't leave Makie too far behind, so I was completely delighted to find that the community has attracted a supremely talented artist on board, Sioux.

Mushroom, Sioux's Makie, helping out with the design process.
Apparently this isn't her best work and just a trial run, but look how delicately this enhances the features. The brush work around the eyes is astonishing.

The eyes! The lashes! The lips! THE HAT!
*faints*

From Makie to MAGIC
Sioux, you can come and do your 'not best work' for me any day of the week!

All photos in this post by Sioux, reproduced with permission. Go to her flickr and tell her how awesome she is. 

Monday, 18 June 2012

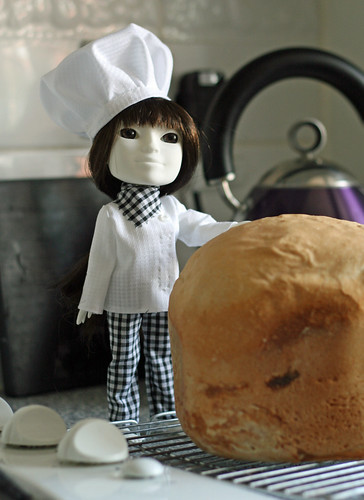
Chef Plink

When I volunteered to make Benoonbenoon's chef outfit, it was quite obvious that I was never going to get away without letting Plink try it on...

Makie
No, she didn't make this. She's just posing, as usual. 


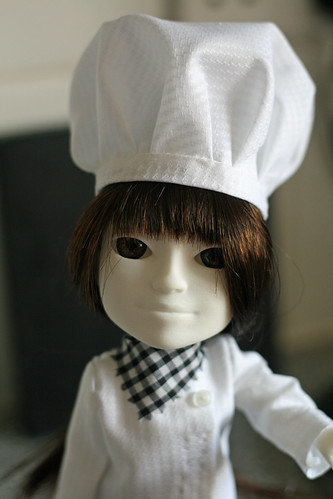
So. The tunic is just my standard blouse pattern, with the left front extended and an extra cm on the length all the way around. Although I managed to construct most of the body on the (borrowed) sewing machine without jamming it this time, the collar and sleeves were set on by hand, as was the velcro. Really annoyed I couldn't find my stash of white velcro, but buggered if I was going to go and buy any more. Although currently covering Plink's... *ahem*... you knows... I think this should fit nicely on a boy Makie just as well.

The trousers are the first pair I've ever made for human or Makie. I could do with adding another cm onto the crotch-to-waist as these are rather hipsters, although I guess it doesn't matter if they're worn with a tunic... wouldn't go wearing them with a t-shirt unless you're partial to builder's bum.

The hat is rather a triumph, I think. Large enough to be ridiculous, but not too big to be completely insane. This was entirely hand-sewn and I'm a bit chuffed with it. Bandanna fastens behind with a popper, it was going to be red but I've got absolutely no red fabric. This is a bit of a surprise. Still, I think the check works quite well.

Makie
Prettier than Gordon Ramsay? 


Benoonbenoon, let me know your address and I'll get your outfit off of Plink the impostor and in the post! ...and if you're reading this, Polk, can you email me too? Ta!