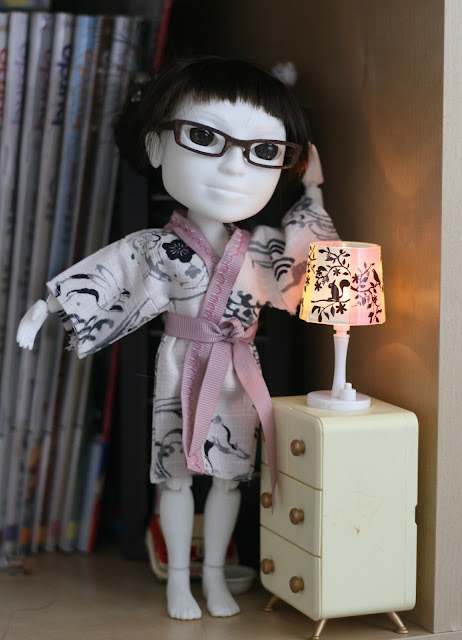
Here at Makie Couture, we're big fans of sleepwear. In fact, we're often to be found securely in our snuggly pyjamas before the clock has struck six pm.
 |
| Plink, about to crash out in her PJ's |
 |
| Comfy, cosy and fab. |
You will need:
- A piece of fabric, about 10 inches by 6 inches.
- Some ribbon, about 18 inches long.
- A piece of A4 paper
- Ruler and pencil
- Chalk pencil
- Needle and thread; you could use a sewing machine.
- An iron is handy.
First of all, make your pattern pieces. This is dead simple, they're both rectangles. 2 x 2" for the sleeves, 3.5 x 5" for the body piece.
 |
| The sleeve piece is the small piece. The body piece is the big piece. Note that both pieces need to be cut on the fold of the fabric. |
Then cut out two sleeves, again making sure that each is on the fold.
Unfold your pieces and mark the midpoints with your chalk pencil.
 |
| Red dots = midpoints of fabric. |
Matching the midpoints and with right sides together, sew the sleeve pieces to the body piece with a scant 1/4 inch seam.
 |
| I've already finished the sleeve openings here. It's easier to do it at this point than when the kimono is assembled! |
Flip open the sleeves like the pages of a book and iron flat. You should have a cross shape like below.
Folding the kimono with right sides together to make a 'T' shape, sew along the red lines. This completes the side and underarm seams.
On what is to be your front, measure and mark the middle with your chalk pencil. Where the neck opening is to be, mark 3/4 of an inch on either side in a 'T' shape.
 |
| Marking the opening is really, really helpful :) |
Cut along the chalk lines and turn your robe the right way out. Fold back the neckline and press with your iron.
 |
| Already looking good! |
 |
| Pink makes us HAPPY. |
 |
| It's loafing time! Just need to nick Melchie's fluffy bunny slippers... |


Great Tutorial - Many Thanks!
ReplyDelete